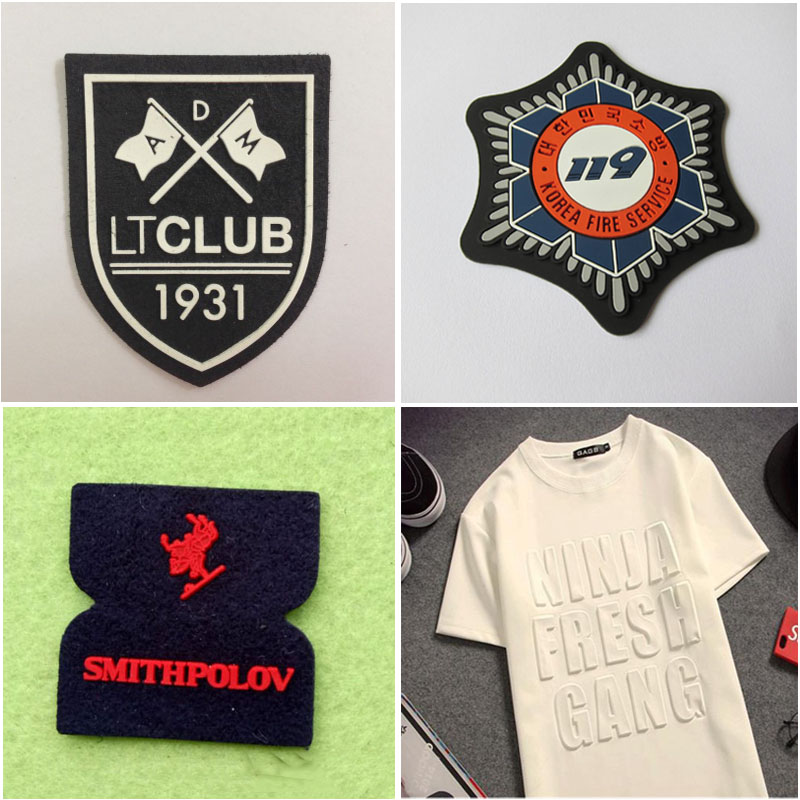
3D silicone labels add a premium, tactile finish to T-shirts, elevating their design with raised textures that blend durability and style. Whether for personalization, brand branding, or craft projects, creating these labels at home or in a small workshop is achievable with the right tools and techniques. Below is a detailed, easy-to-follow guide to help you craft professional-looking 3D silicone labels for T-shirts.
1. Gather the Necessary Materials
Before starting, ensure you have all the essential supplies to avoid interruptions. Quality materials directly impact the final result, so opt for reliable products:
- 3D Silicone Rubber: Choose a textile-compatible, flexible silicone (e.g., liquid silicone rubber with a shore hardness of 15–30A for comfort). Look for food-grade or skin-safe options if the label will touch skin.
- Silicone Pigments (Optional): For colored labels, use oil-based silicone pigments to mix custom hues—avoid water-based pigments, as they won’t blend with silicone.
- Label Mold: Use a pre-made 3D mold (silicone or polyurethane) with your desired design (logo, text, or pattern) or create a custom mold using mold-making rubber and a master template (e.g., a 3D-printed design or hand-carved model).
- T-Shirt: Select a cotton, cotton-polyester blend, or other natural fiber T-shirt—avoid highly stretchy synthetic fabrics that may warp the label during application.
- Primer for Textiles: A silicone adhesion primer (specifically designed for fabrics) to ensure the label bonds securely to the T-shirt.
- Tools: Mixing cups, stir sticks (disposable for silicone), a heat gun or oven (for curing), a small brush (for applying primer), and tweezers (for positioning the label).
- Protective Gear: Disposable gloves (to avoid skin contact with silicone) and a face mask (if working with mold-making materials).

2. Prepare the T-Shirt and Mold
Proper preparation ensures the label adheres well and maintains its shape:
- Clean the T-Shirt: Wash and dry the T-shirt to remove dirt, oils, or fabric softener, which can prevent adhesion. Iron the area where the label will be applied to eliminate wrinkles—smooth fabric helps the silicone bond evenly.
- Prime the Fabric: Apply a thin layer of textile adhesion primer to the target area using a small brush. Let the primer dry completely (follow the manufacturer’s instructions, usually 10–20 minutes) until it’s tacky but not wet.
- Prepare the Mold: Clean the 3D mold with a lint-free cloth to remove dust or debris. If using a new mold, apply a mold release agent (optional but recommended) to ensure easy removal of the silicone label after curing. For custom molds, ensure the master template is securely placed and the mold is fully cured before use.
3. Mix and Color the Silicone
Silicone must be mixed correctly to cure properly—follow these steps for a smooth consistency:
- Measure the Silicone: Most 3D silicone rubbers come in two parts (base and catalyst) that need to be mixed in a specific ratio (e.g., 10:1 by weight or volume). Use a digital scale for accuracy—incorrect ratios can result in sticky or brittle labels.
- Add Pigment (If Desired): For colored labels, mix a small amount of silicone pigment into the base before adding the catalyst. Start with 1–2% pigment by weight and stir thoroughly to avoid streaks. Test the color on a small piece of silicone if you’re aiming for a specific shade.
- Mix Thoroughly: Combine the base and catalyst in a mixing cup and stir slowly but vigorously for 2–3 minutes. Scrape the sides and bottom of the cup to ensure no unmixed silicone remains—air bubbles can form if you stir too quickly, so mix gently to minimize them. If bubbles appear, let the mixture sit for 5–10 minutes to allow bubbles to rise to the surface, or use a vacuum chamber (for professional results) to degas.
4. Pour and Cure the Silicone Label
Carefully pour the silicone into the mold and cure it to form the 3D shape:
- Pour the Silicone: Slowly pour the mixed silicone into the mold, filling it to the top. Tap the mold gently on a flat surface to release any trapped air bubbles—this ensures the silicone fills all details of the mold (e.g., small text or intricate logos).
- Cure the Silicone: The curing method depends on the silicone type. Most textile-compatible silicones cure at room temperature (24–48 hours) or with heat (10–15 minutes in an oven at 100–120°C/212–248°F). If using heat, place the mold on a baking sheet and avoid overheating, as this can damage the mold or the silicone. Follow the manufacturer’s curing instructions for optimal results.
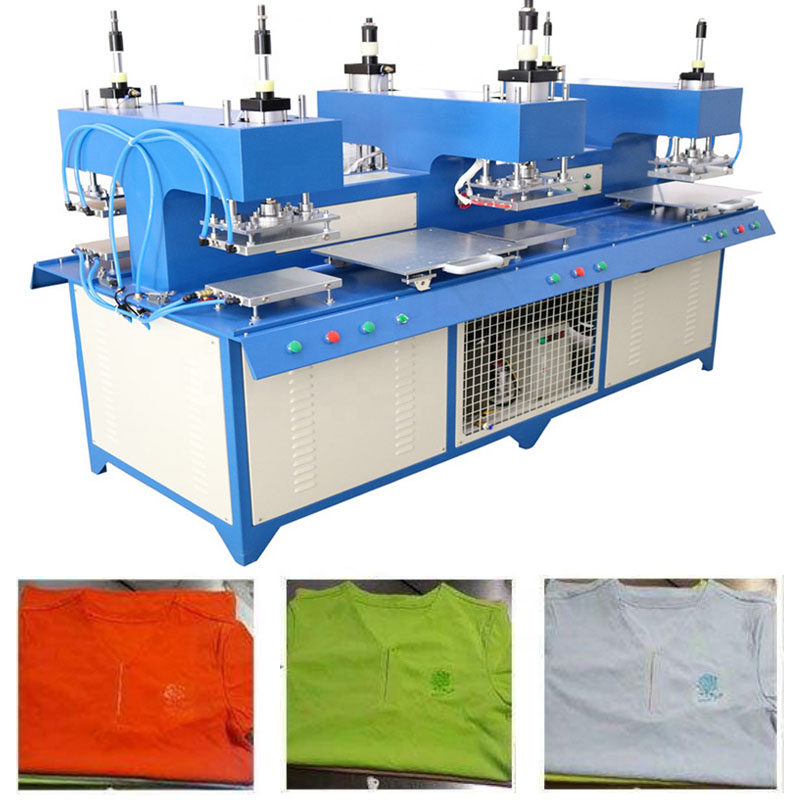
5. Apply the Label to the T-Shirt
Silicone labels are pressed onto t-shirts using an embossing machine, resulting in t-shirts that are aesthetically pleasing and fashionable.
With these steps, you can create durable, eye-catching 3D silicone labels that add a professional touch to any T-shirt. Whether for personal use, gifting, or small-scale branding, this DIY method is cost-effective and allows for endless customization possibilities!
Post time: Nov-12-2025